This chapter gives a general introduction for the tool SimPacSi.
Contents
Step 6 - Confirmation of the alternative
Step 8 - Start simulation of the alternative
Step 9 - Results of the alternative
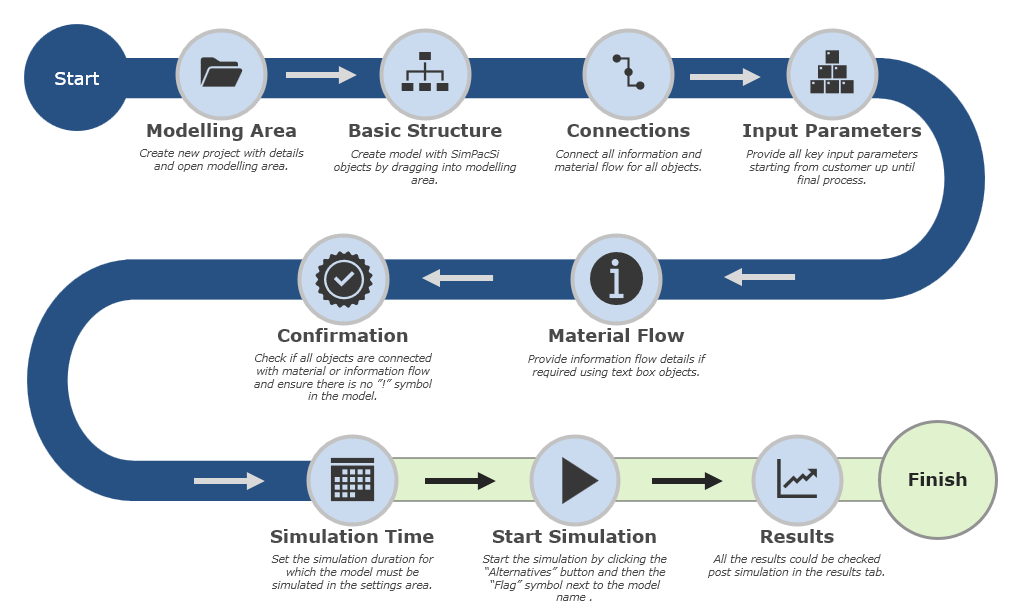
Figure 1 - Overview of model creation
Create a new project with details and open the modeling area
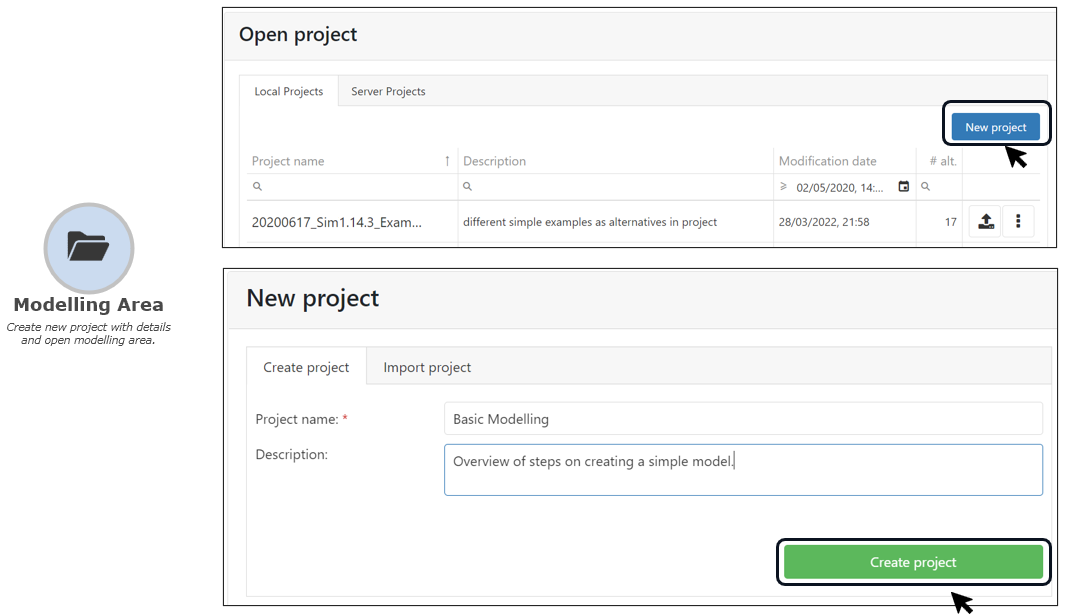
Figure 2 - Modeling surface
Create the model of the desired material flow with SimPacSi objects by dragging them into the modeling area. Drag the desired objects into the modeling area. Form a basic structure of the material flow.
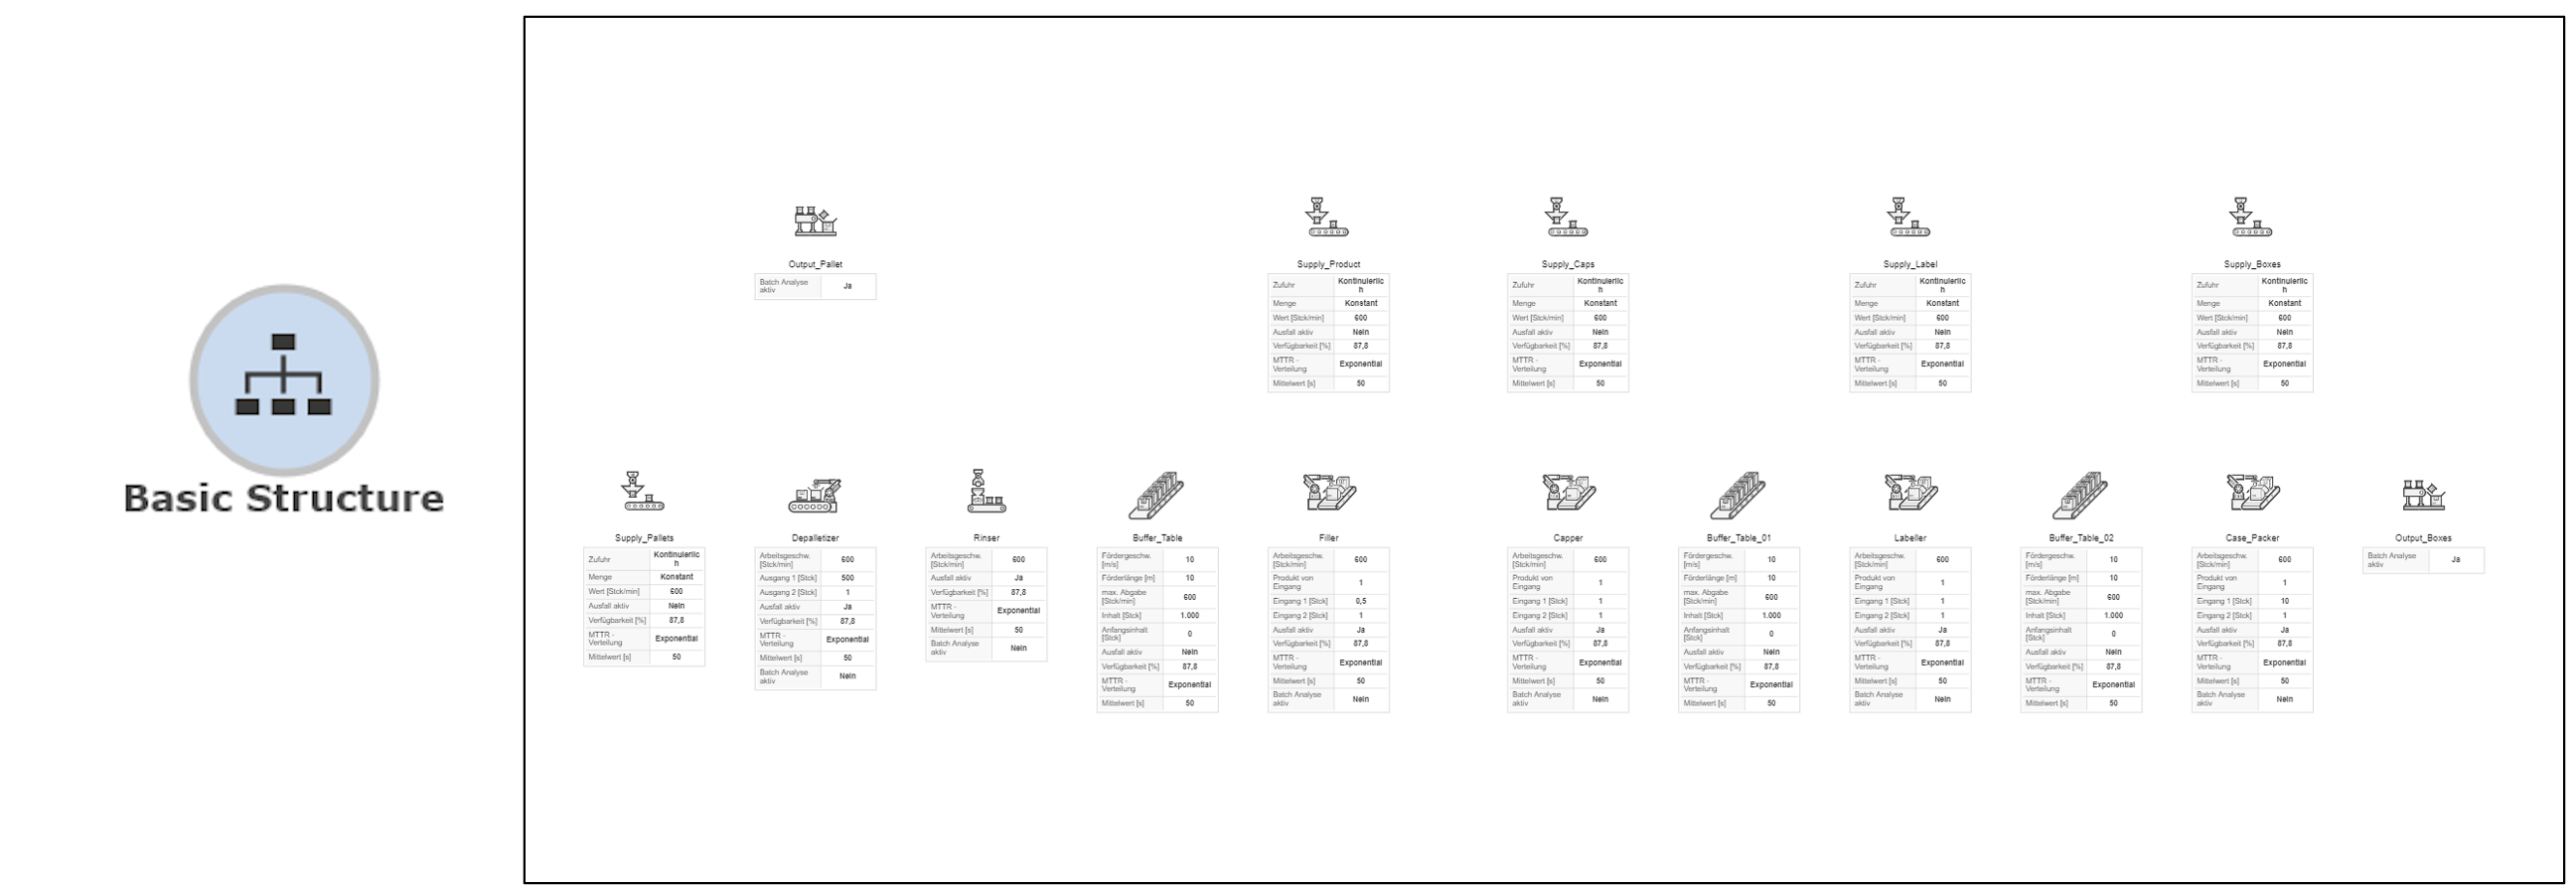
Figure 3 - Basic structure
After placing the objects, provide all basic connection requirements for the material flow. Create all connections between the objects according to the material flow.
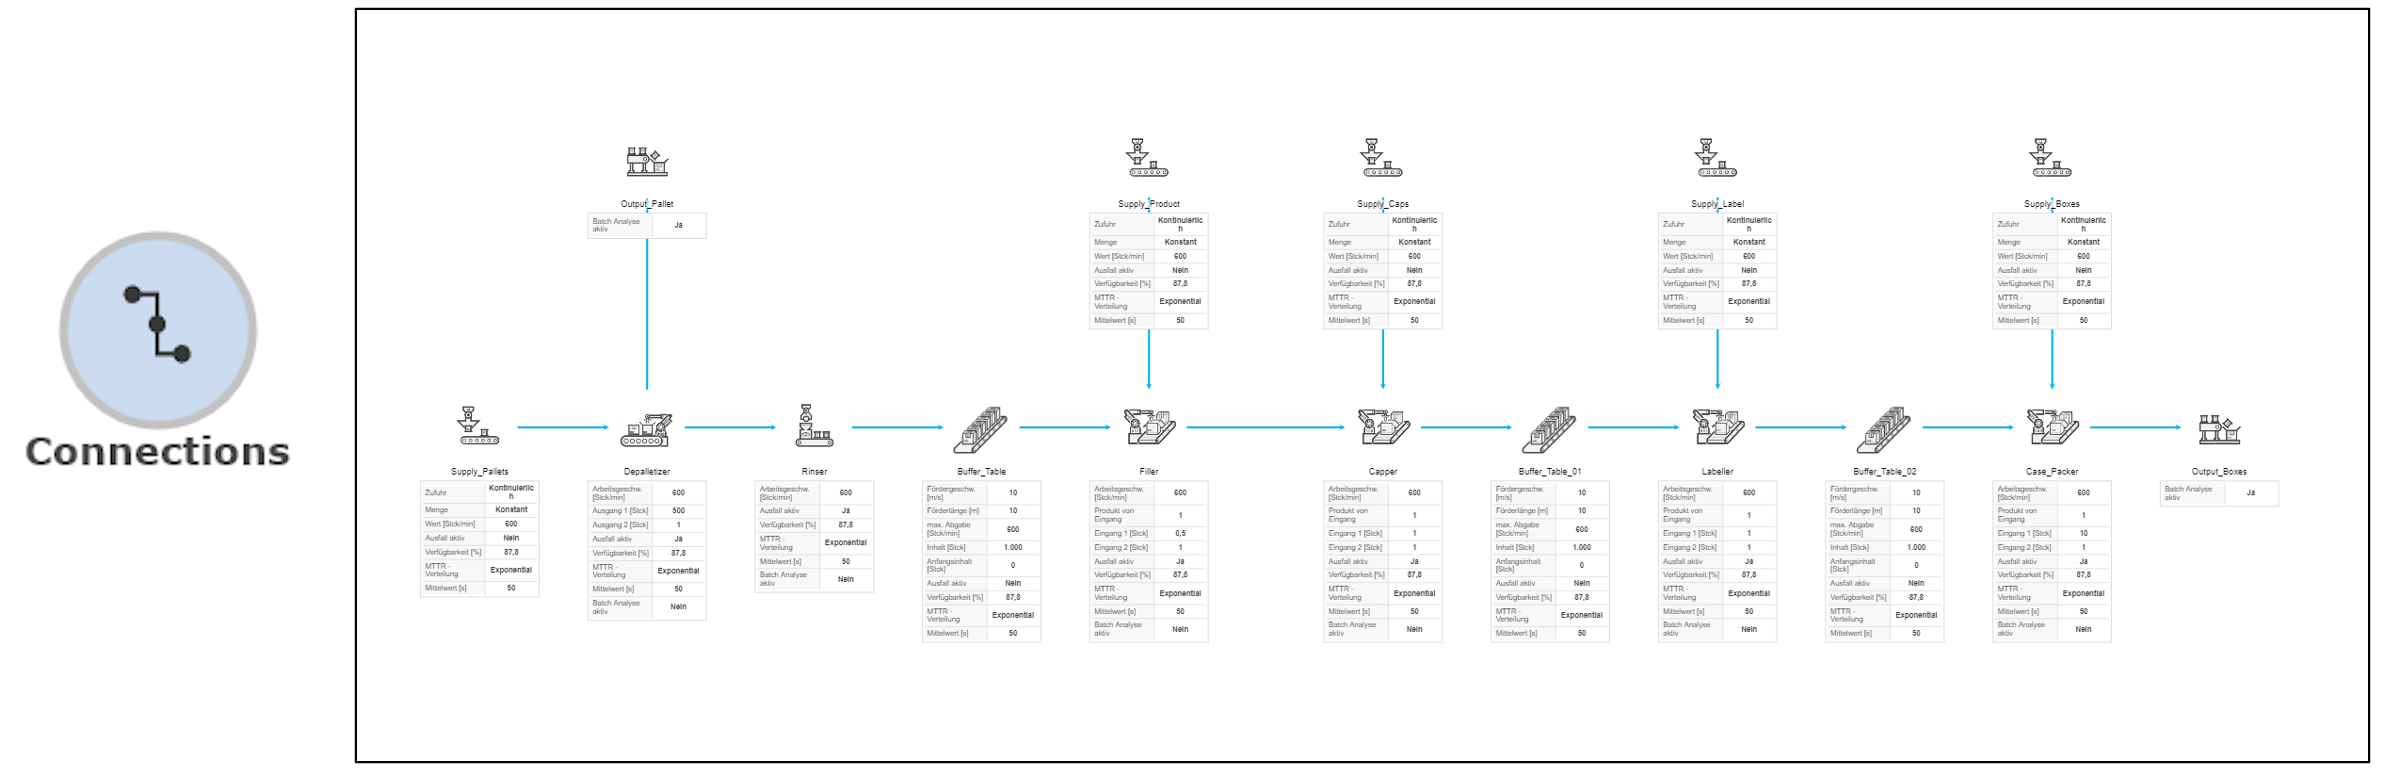
Figure 4 - Connections
If needed, label all process objects and provide any required inputs for the simulation.
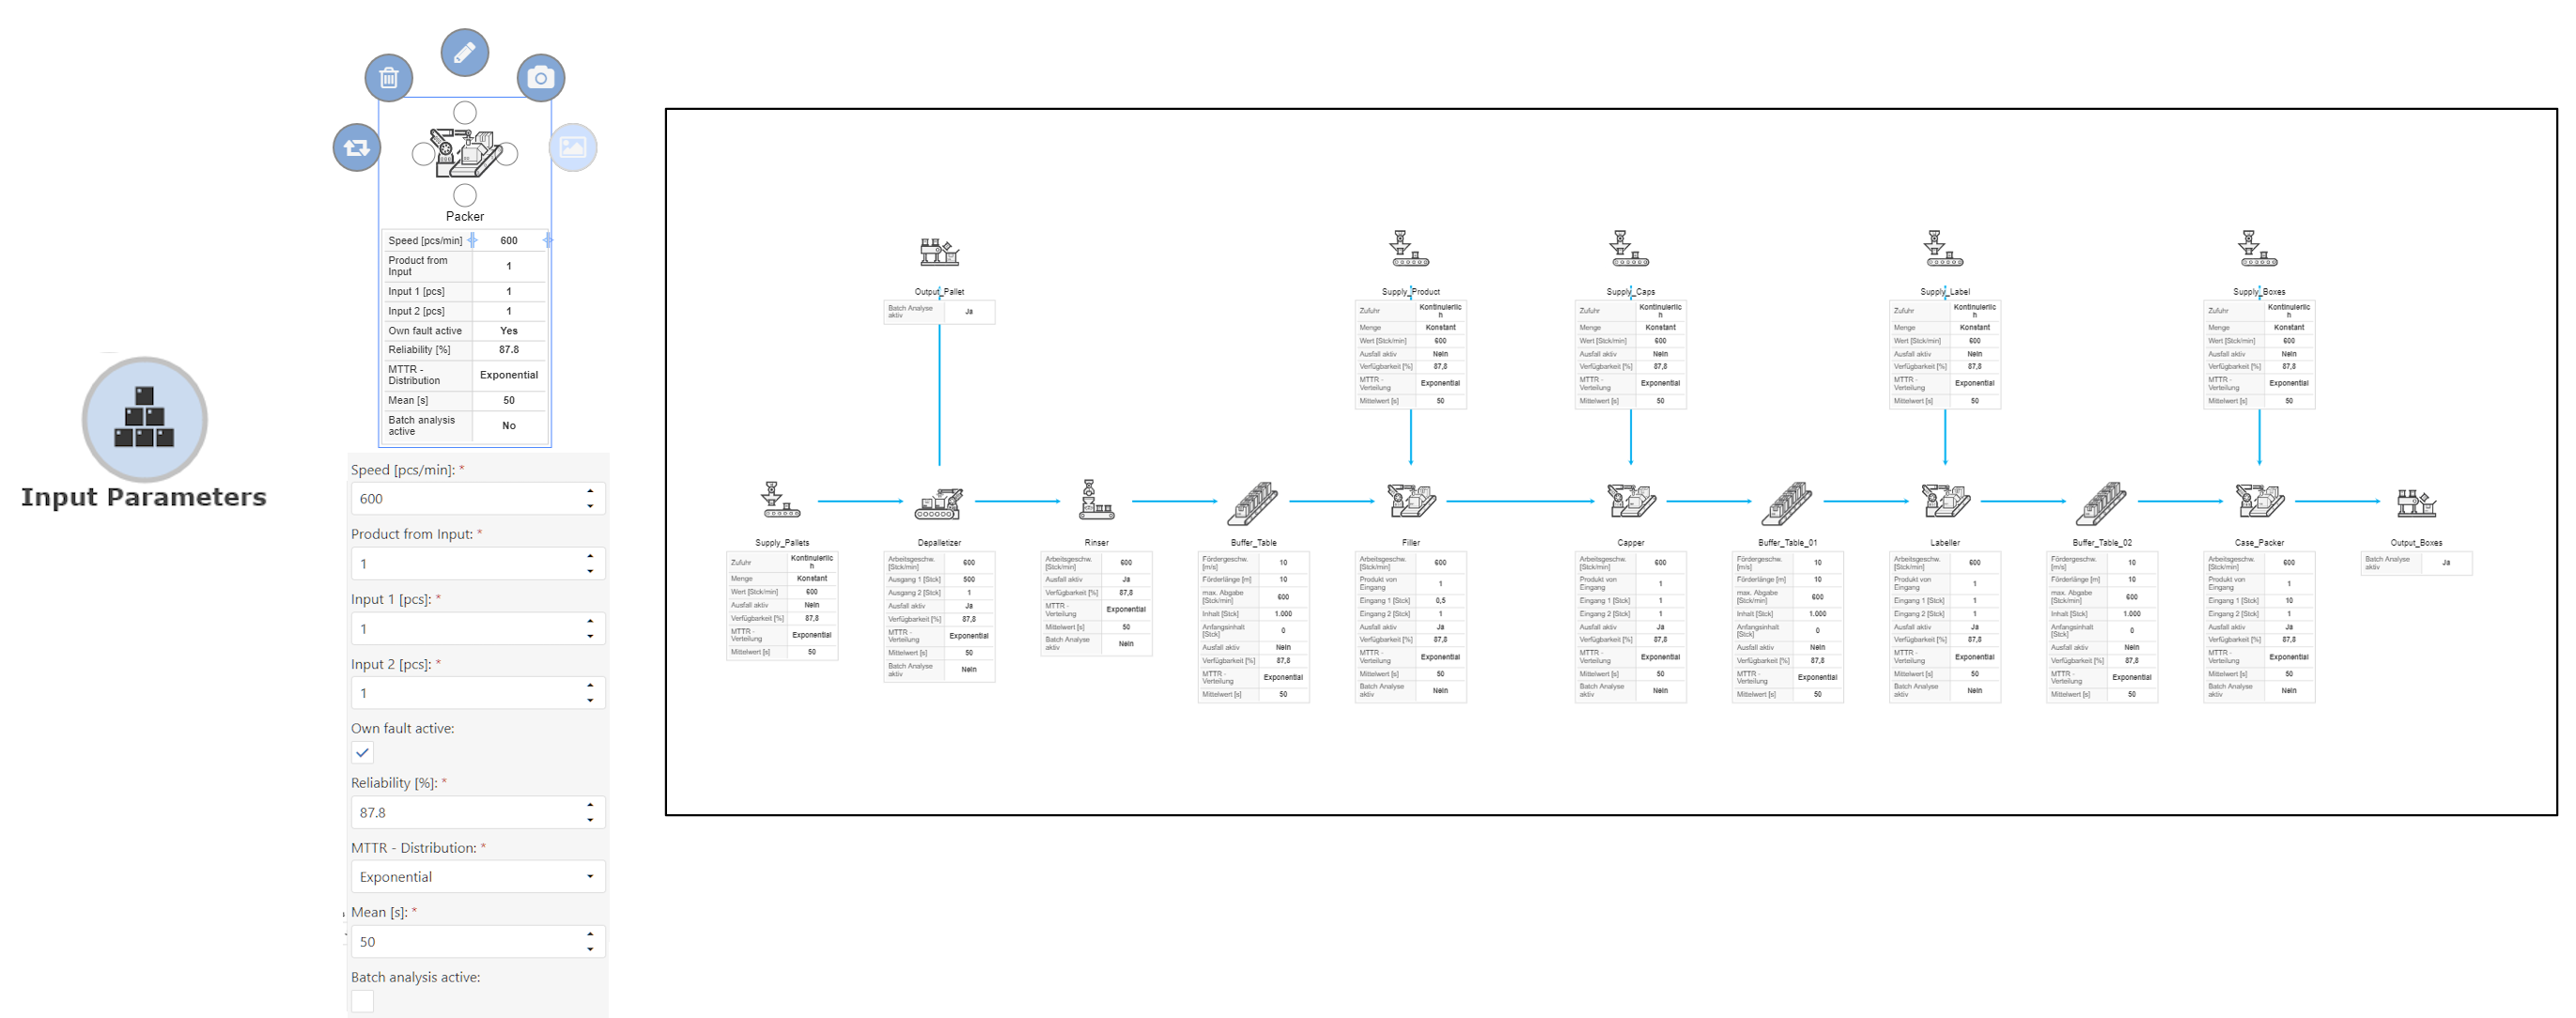
Figure 5 - Input parameters
If needed, specify details about the material flow using text box objects. If needed, add labels using the note object in the modeling area.
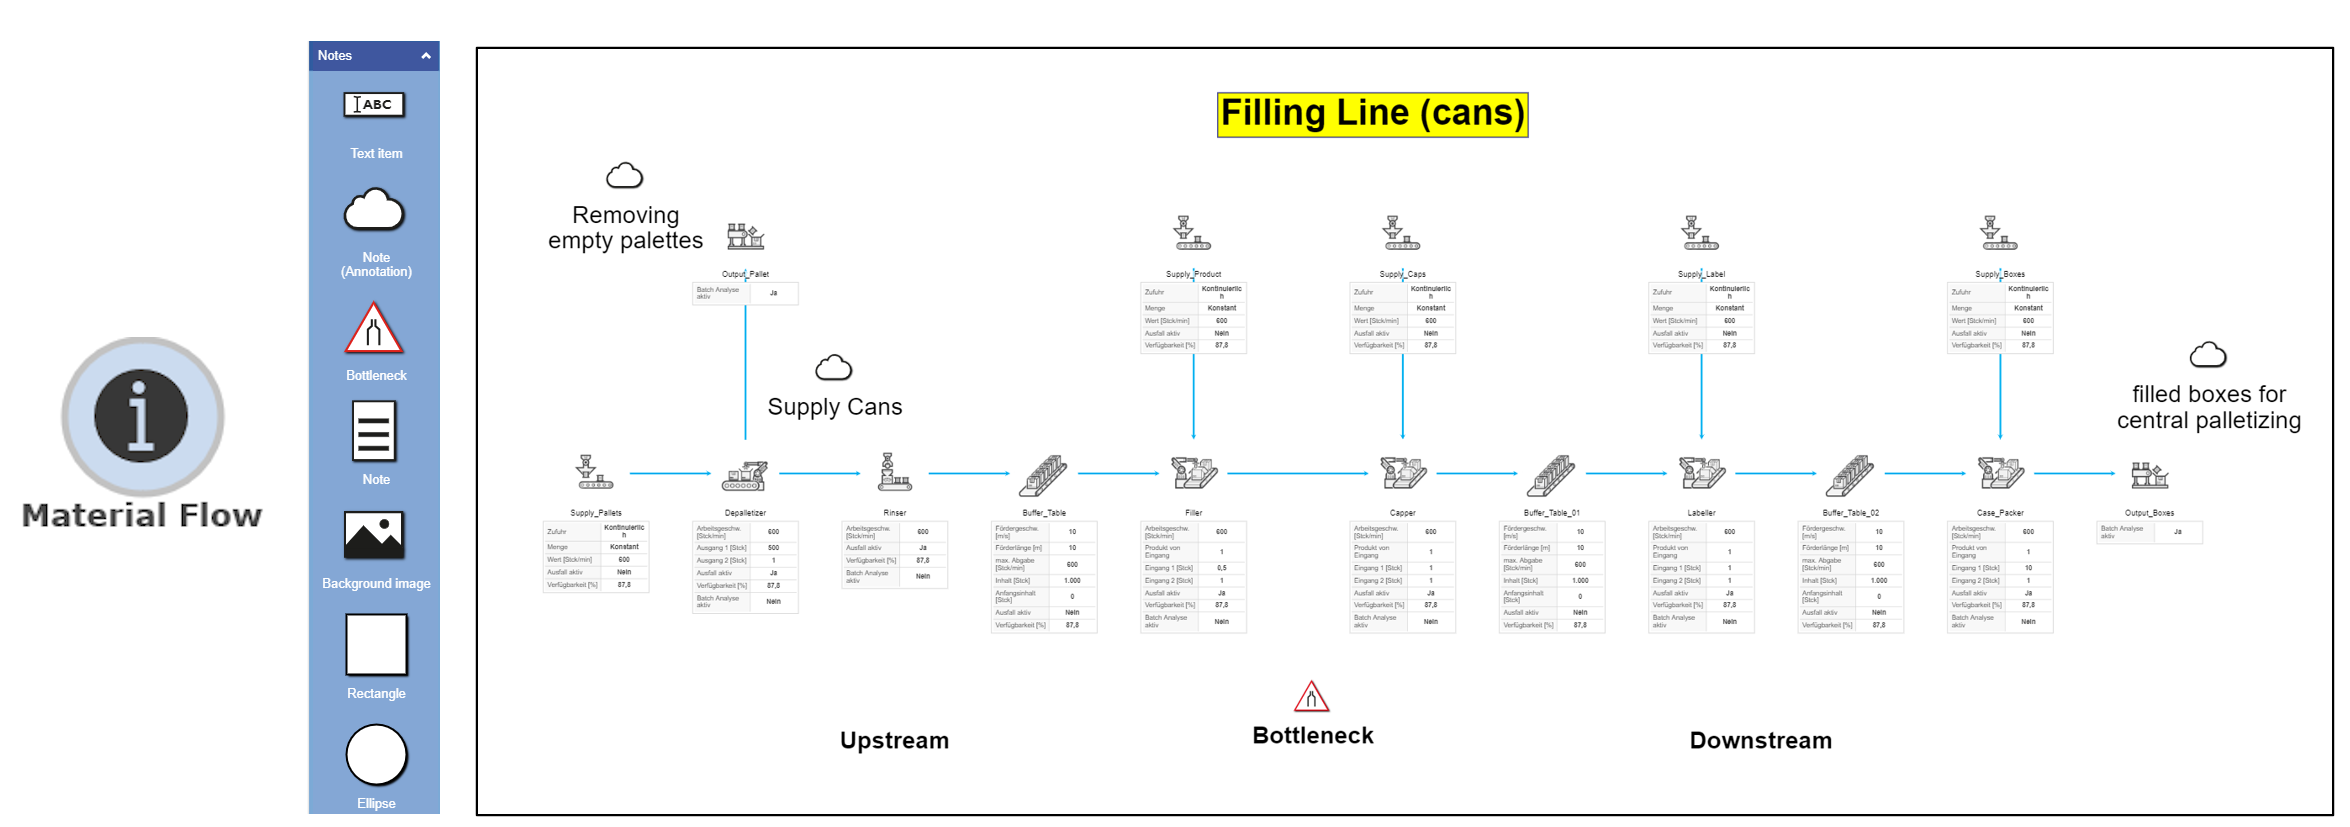
Figure 6 - Material flow
Check that all objects are connected to the material or information flow. Make sure that there is no “!” symbol in the model.
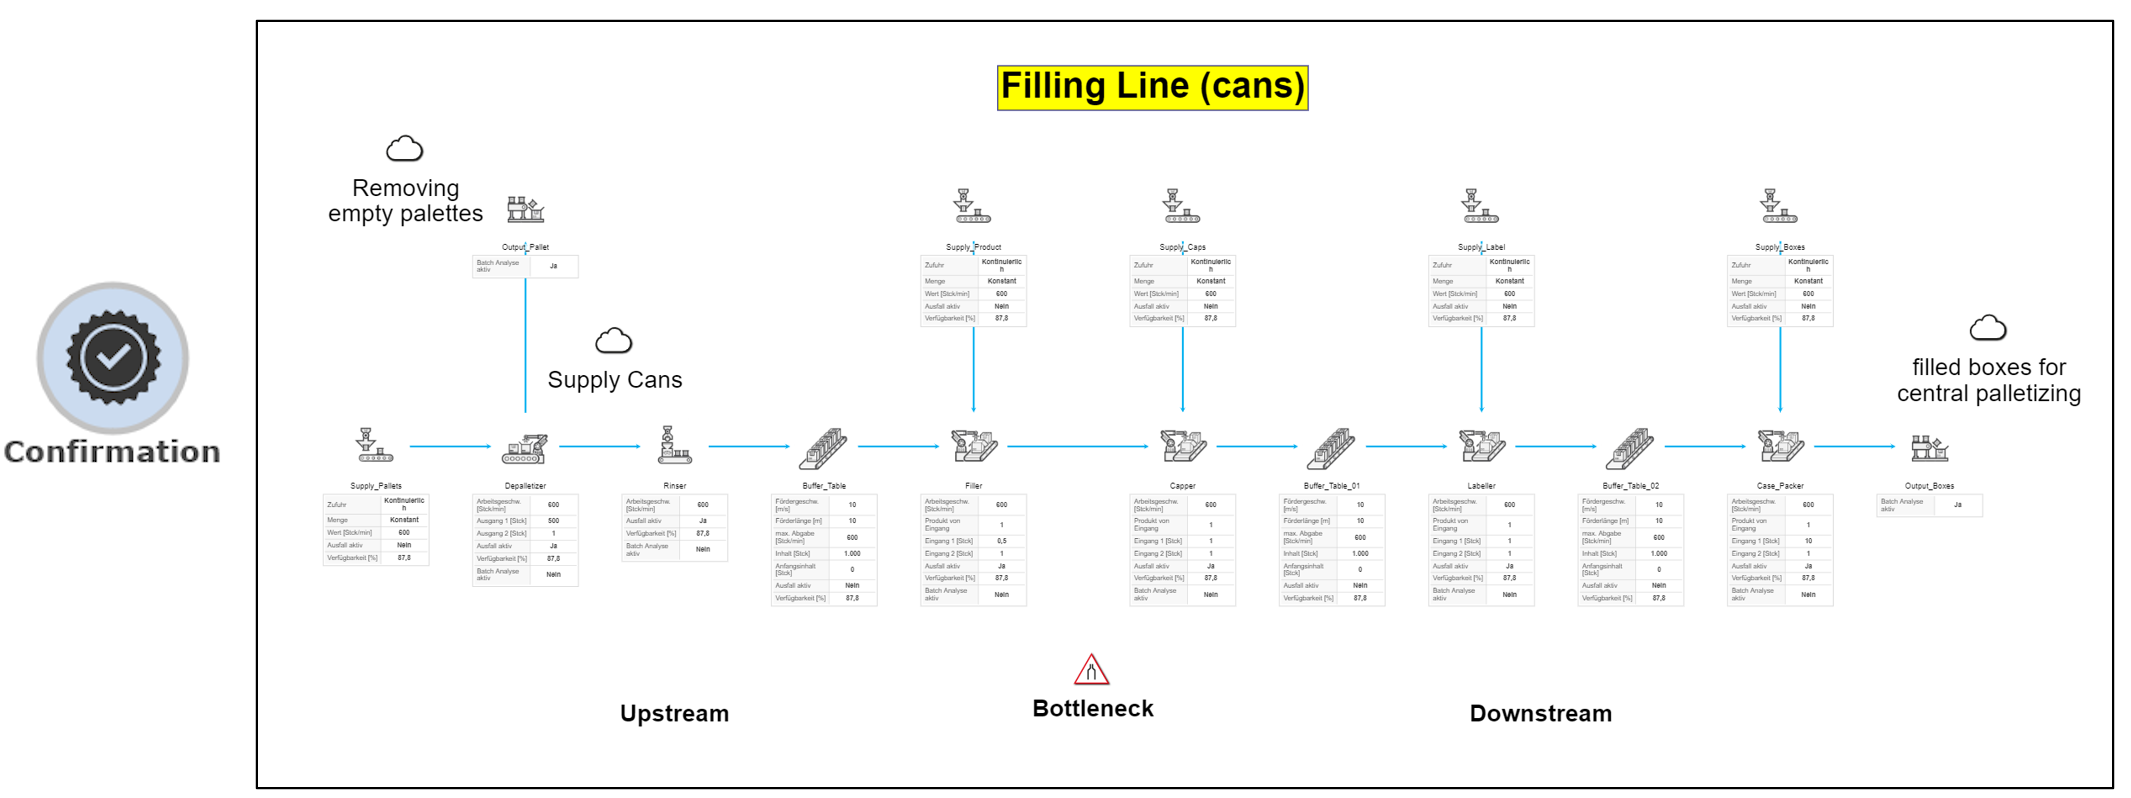
Figure 7 - Confirmation
Figure 8 - Simulation time
Start the simulation by clicking on the “Alternatives” button and then on the “Flag” icon next to the model name.
After specifying the simulation duration, the simulation can be started. The Play button starts the simulation and the progress is shown on the display.
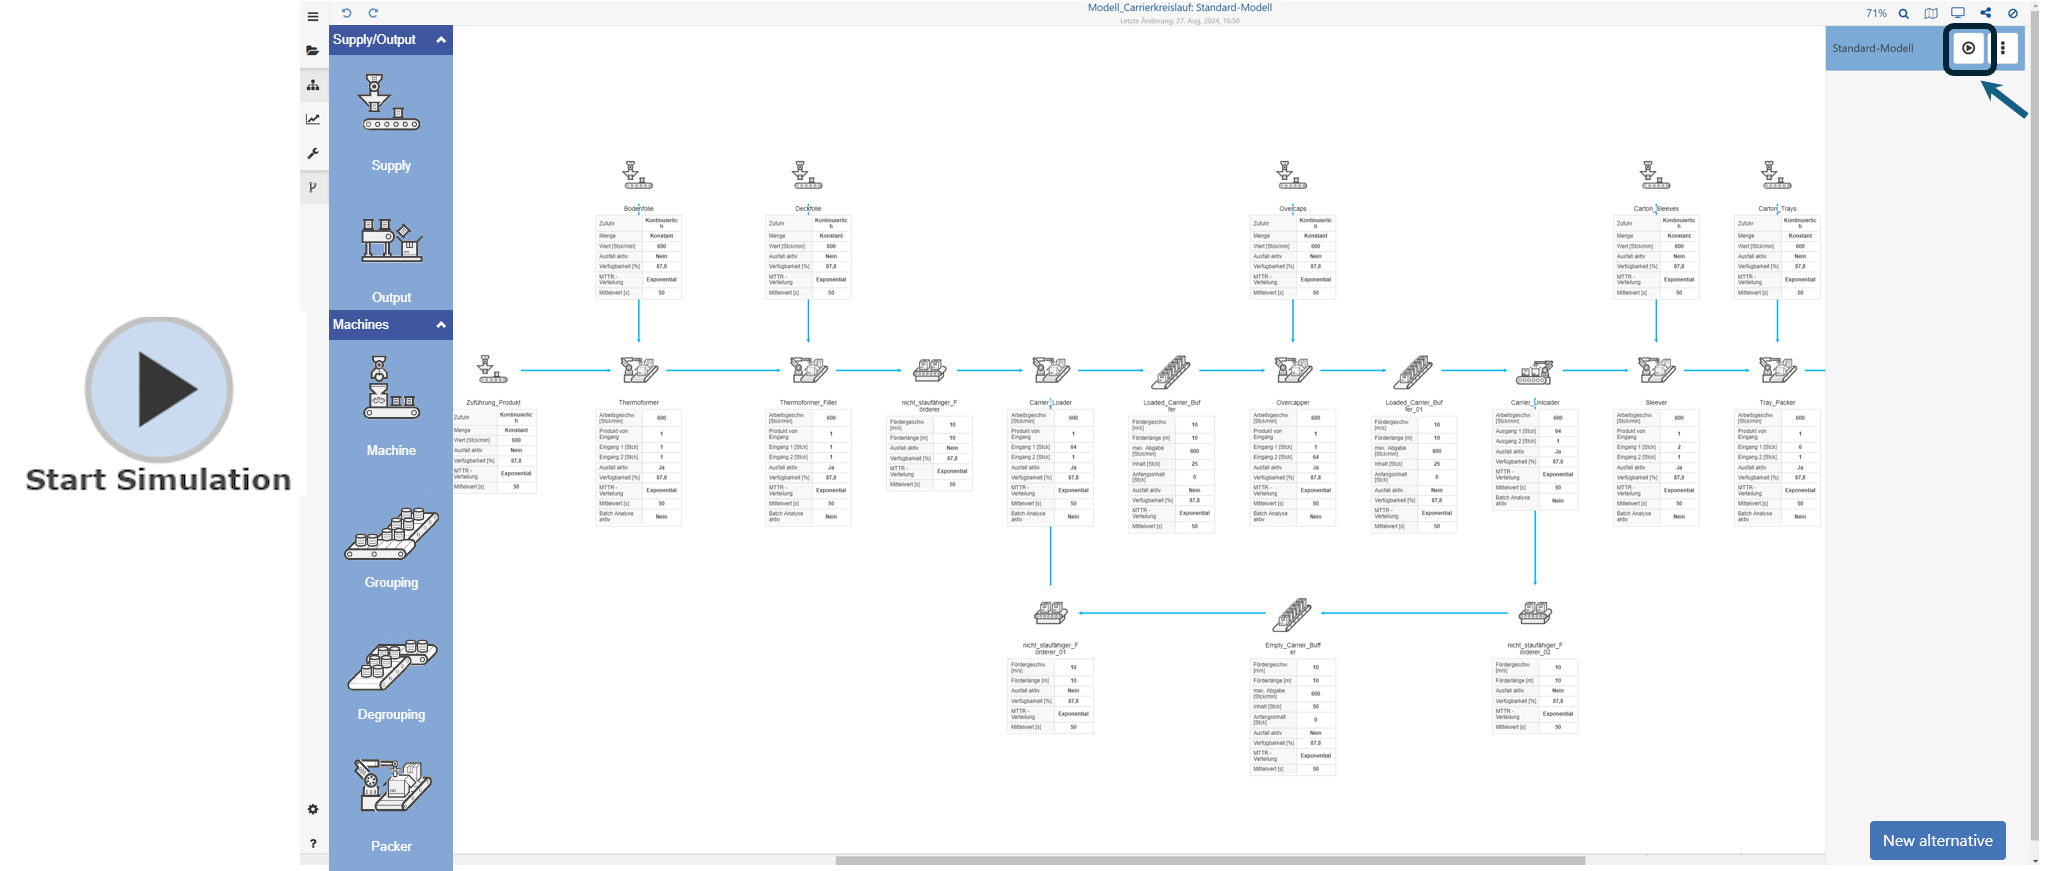
Figure 9 - Start simulation
Figure 10 - Results
Step 6 - Confirmation of the alternative
Check that all objects are connected to the material or information flow. Make sure that there is no “!” symbol in the model.
Figure 11 - Confirmation of the alternative
Step 8 - Start simulation of the alternative
Start the simulation by clicking on the “Alternatives” button and then on the “Flag” icon next to the model name. After specifying the simulation duration, the simulation can be started.
The play button starts the simulation and the progress is shown on the display.
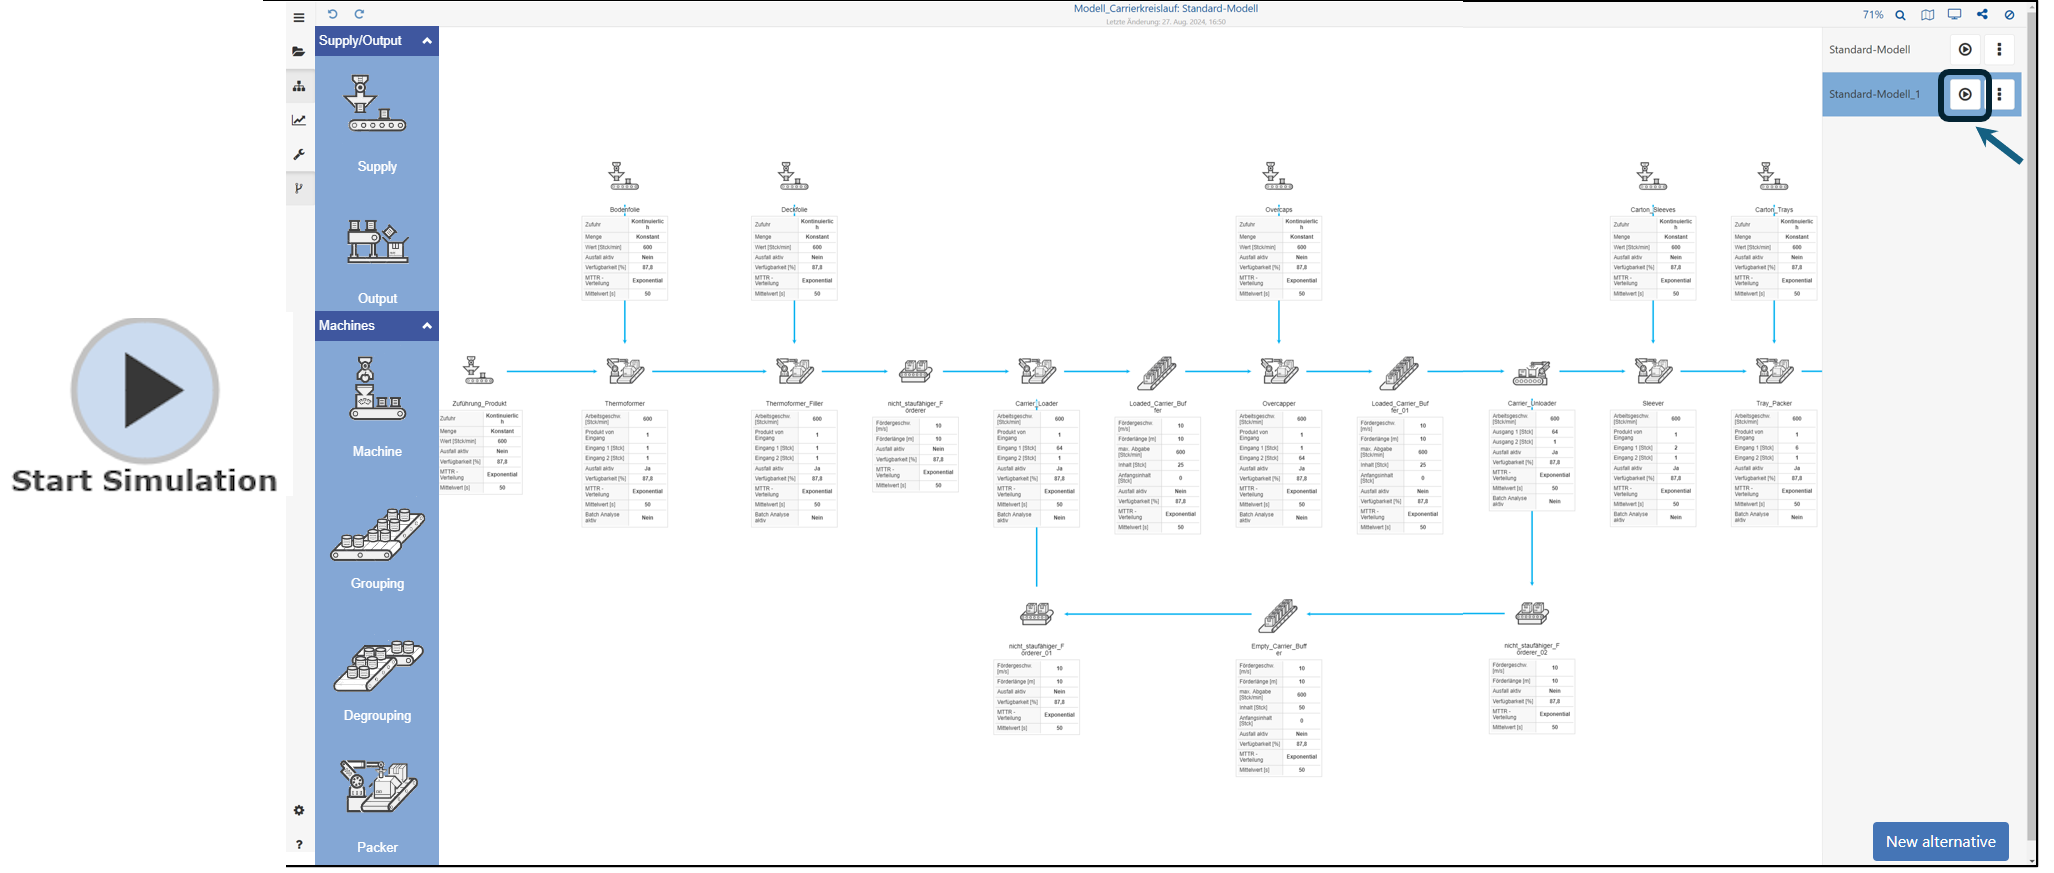
Figure 12 - Start simulation of the alternative
Step 9 - Results of the alternative
All results can be checked after the simulation in the “Results” tab. The results of the simulation can be displayed in the “Results” tab. Several sections are available for interpretation and improvement.
Figure 13 - Results of the alternative
The results of the alternatives can be compared directly with the base model to illustrate the improvements. The “Alternative” button can be used to select two different models to compare the results.
Figure 14 - Compare the results
© SimPlan AG - Hanau District Court, Commercial Register (Part B) 6845 - info@simplan.de - www.simplan.de/en